
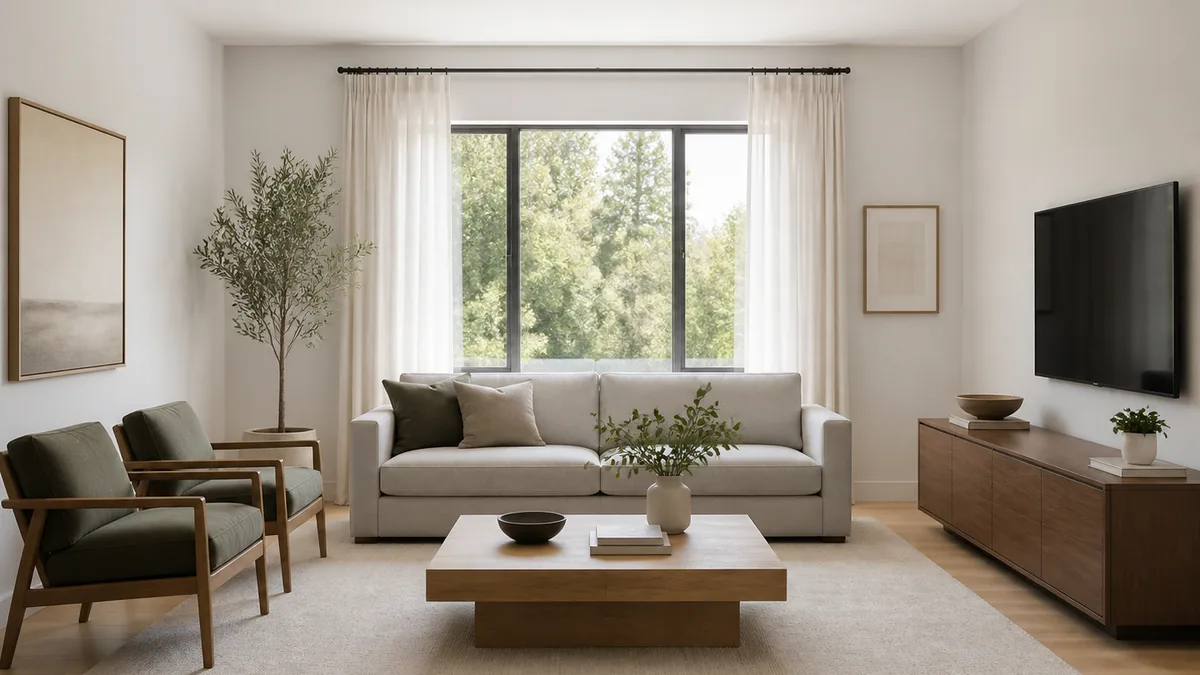
Upload an architectural render or space image. Adjust Rotate, Vertical, and Zoom to generate a new view.
Drag to rotate and elevate
Camera controls
AI Perspective Changer Example
Compare interior, exterior, and 3D floor plan views before you sign in and generate your own.
Interior
Eye-Level to Corner View
Eye-Level View
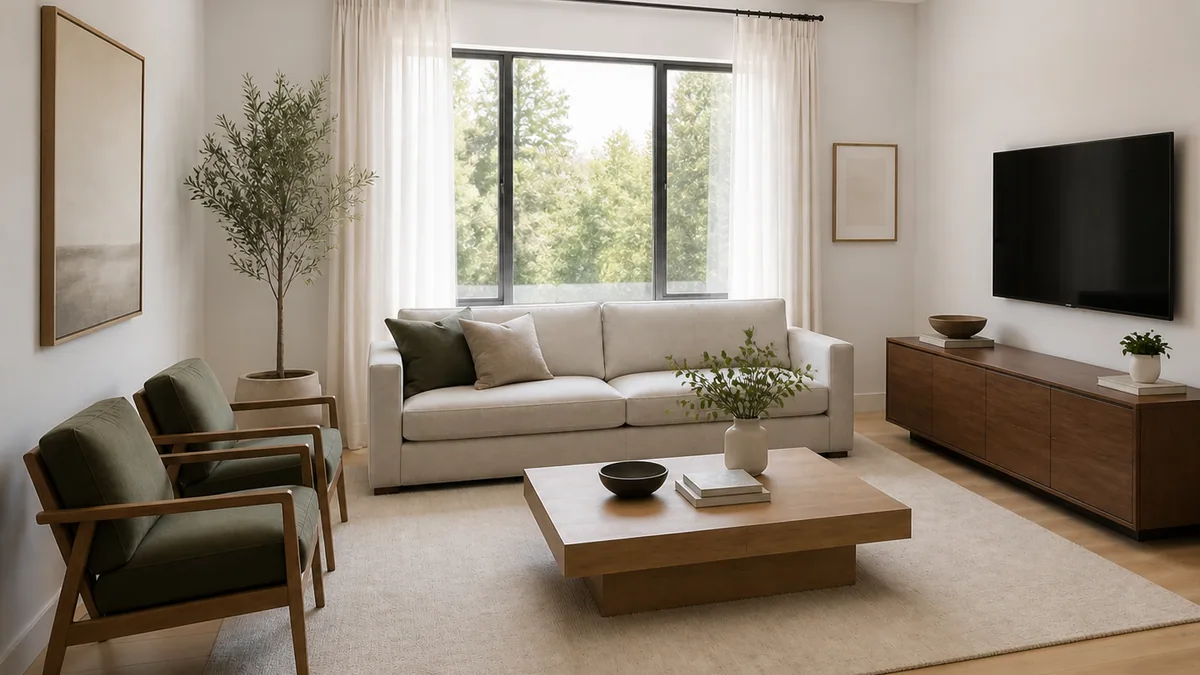
Corner View
Sign in to upload your own render or space image and generate a new view.

AI Perspective Changer for Architectural Renders
Change camera angles with AI from one architectural render, room visualization, or space image. Use the Rotate, Vertical, and Zoom controls to explore a new viewpoint. The AI estimates depth and fills in areas hidden in the source, so use the result for visual exploration rather than exact geometry.
AI Perspective Changer:
One Space, Four Camera Angles
Compare the same source image across four camera-control settings. Each result is an AI-estimated view, so check it against the original before using it in a design review.
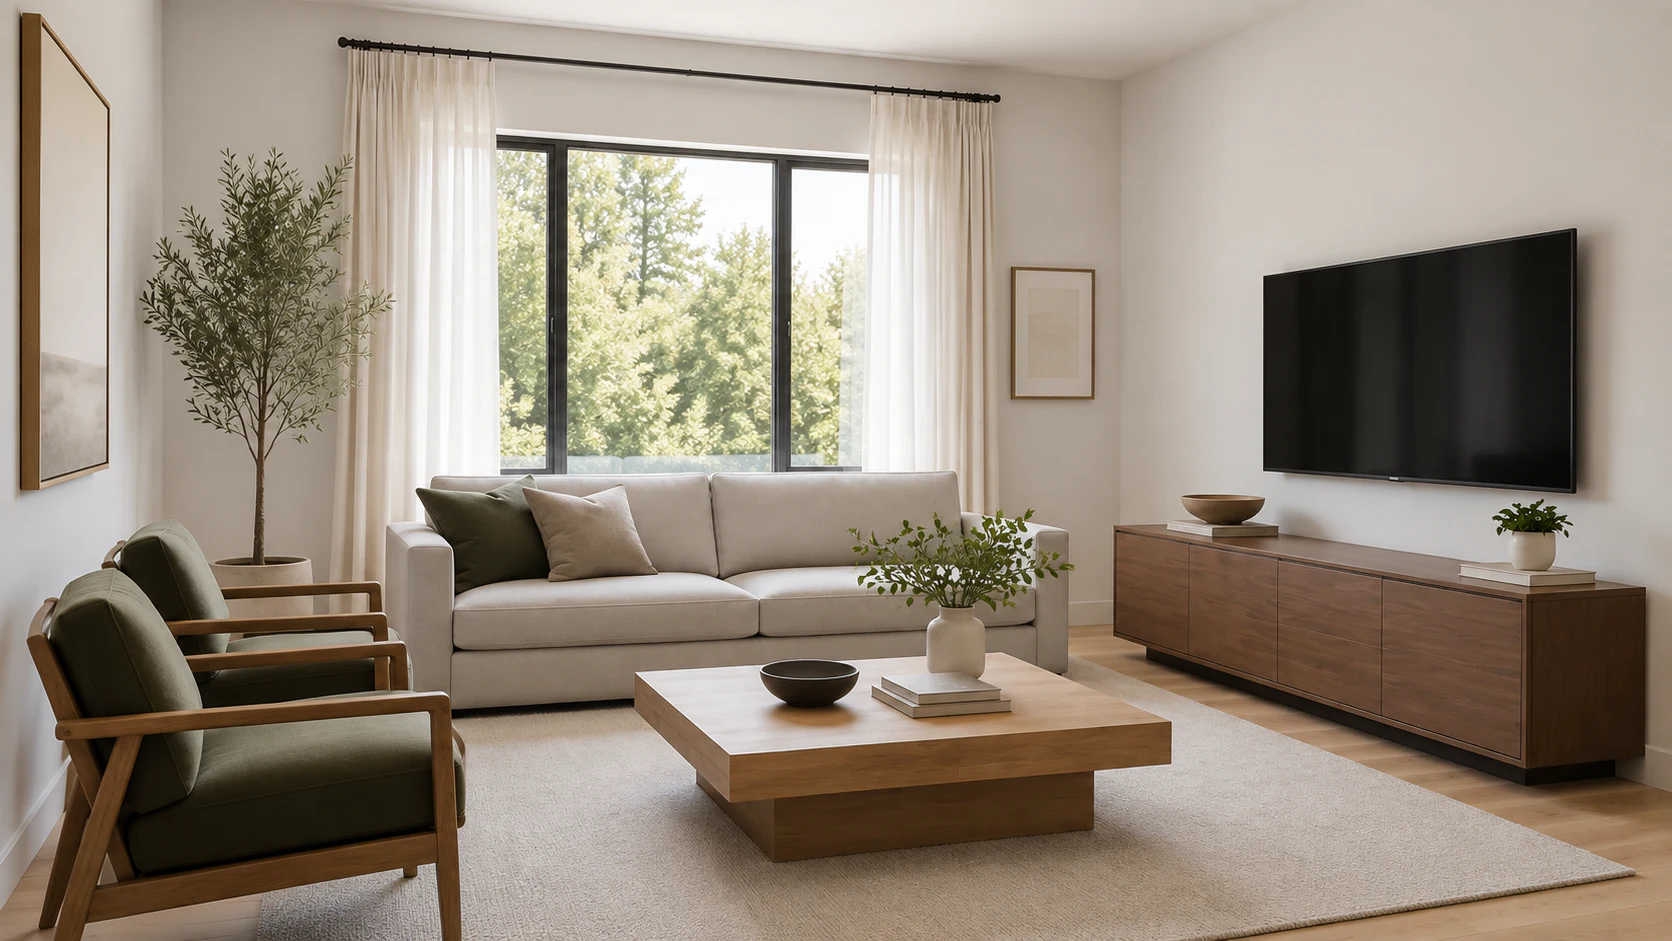 Rotate -30°
Left Camera Orbit
Review the side wall and circulation. Check openings, furniture placement, and room proportions.
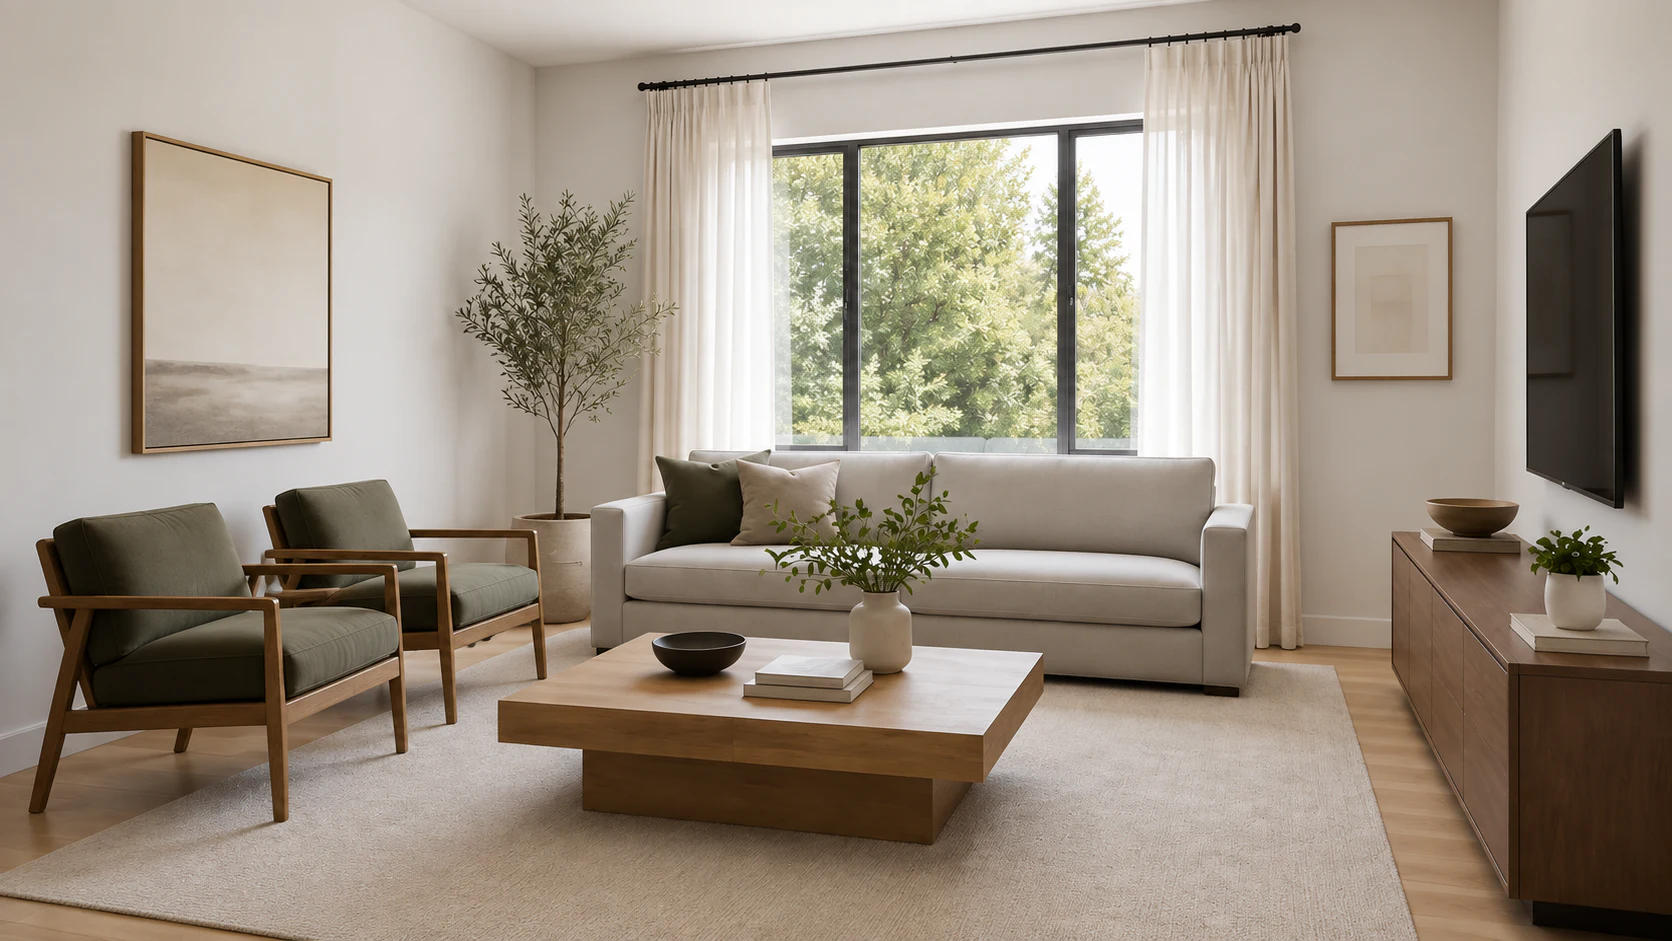 Rotate +30°
Right Camera Orbit
Compare another presentation angle. Check windows, materials, and furniture placement.
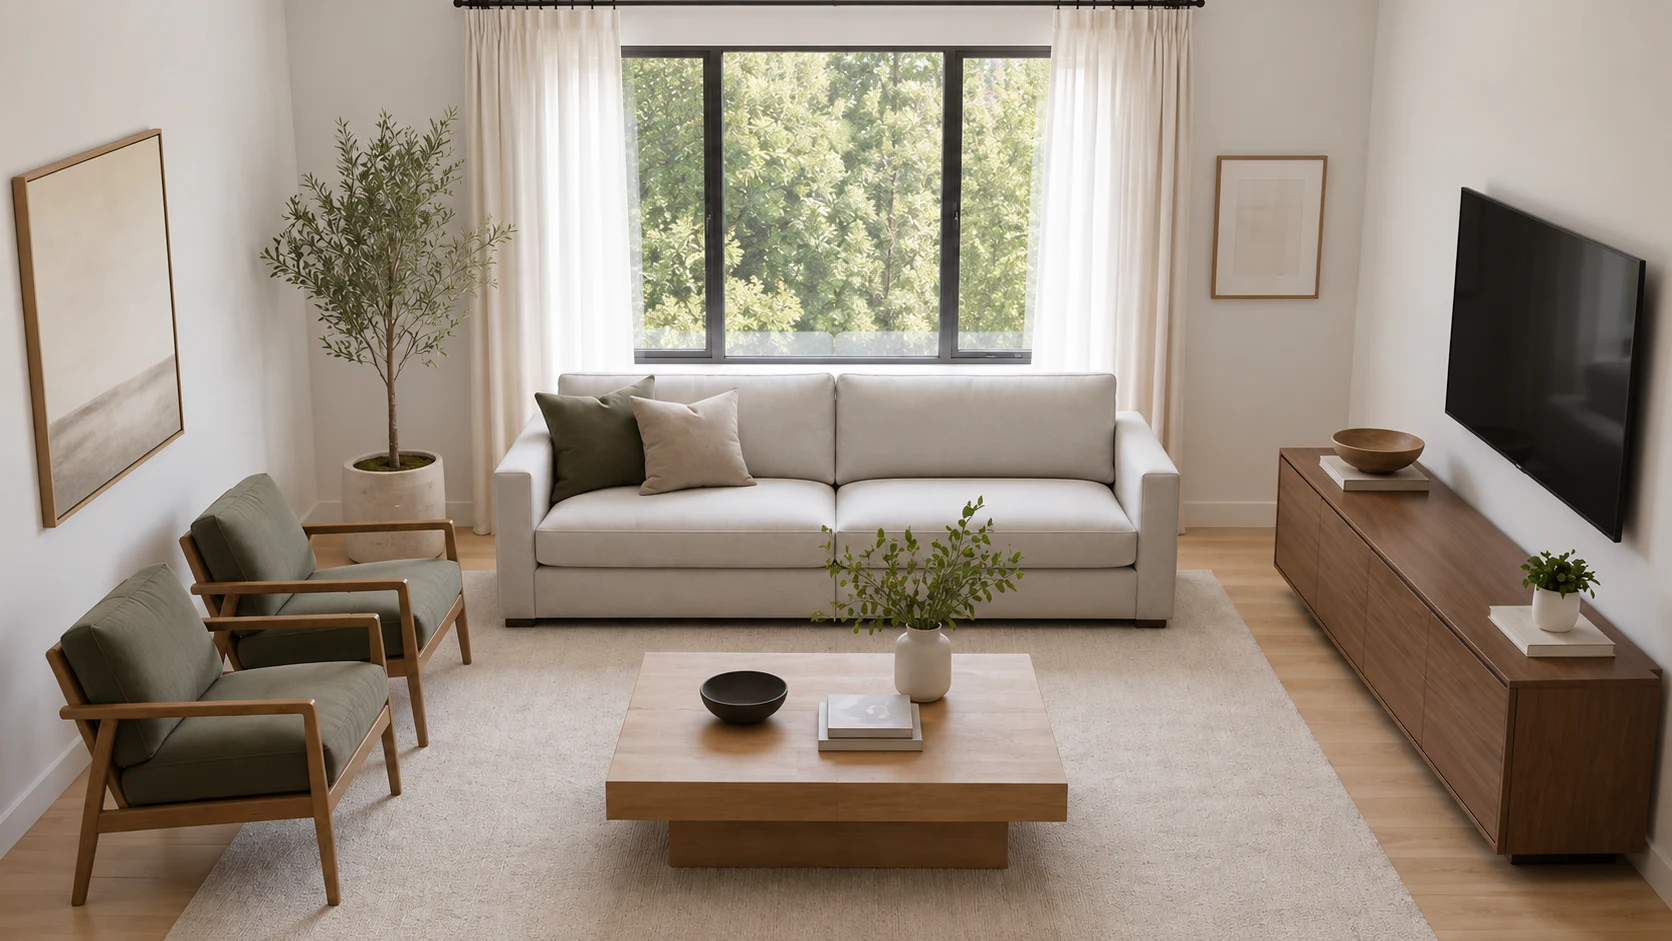 Vertical +15°
Moderately Elevated View
Review the layout from above. Check circulation, furniture placement, and room proportions.
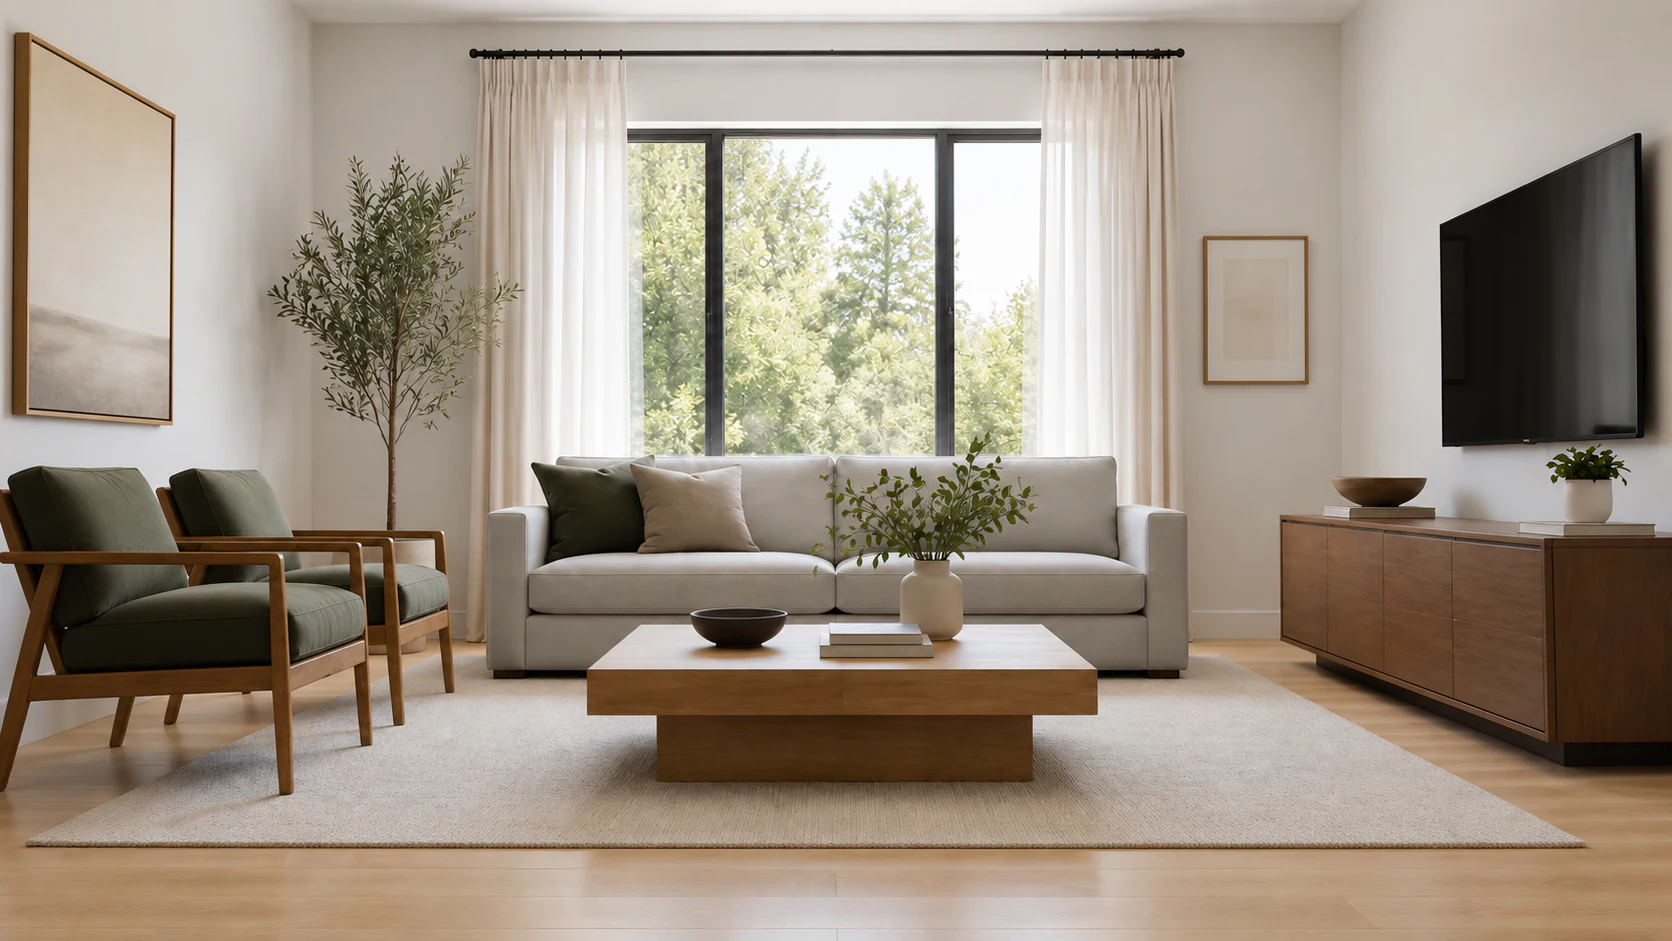 Vertical -12°
Moderate Low-Angle View
Review ceiling features and the sense of height. Check vertical lines, furniture scale, and room proportions.
AI-generated views estimate hidden areas. They are still images—not CAD models or continuous walkthroughs—and geometry may vary between angles.
More Perspective Changer Examples
The same workflow can also explore camera changes for exterior renders, close material views, and 3D floor plan concepts.
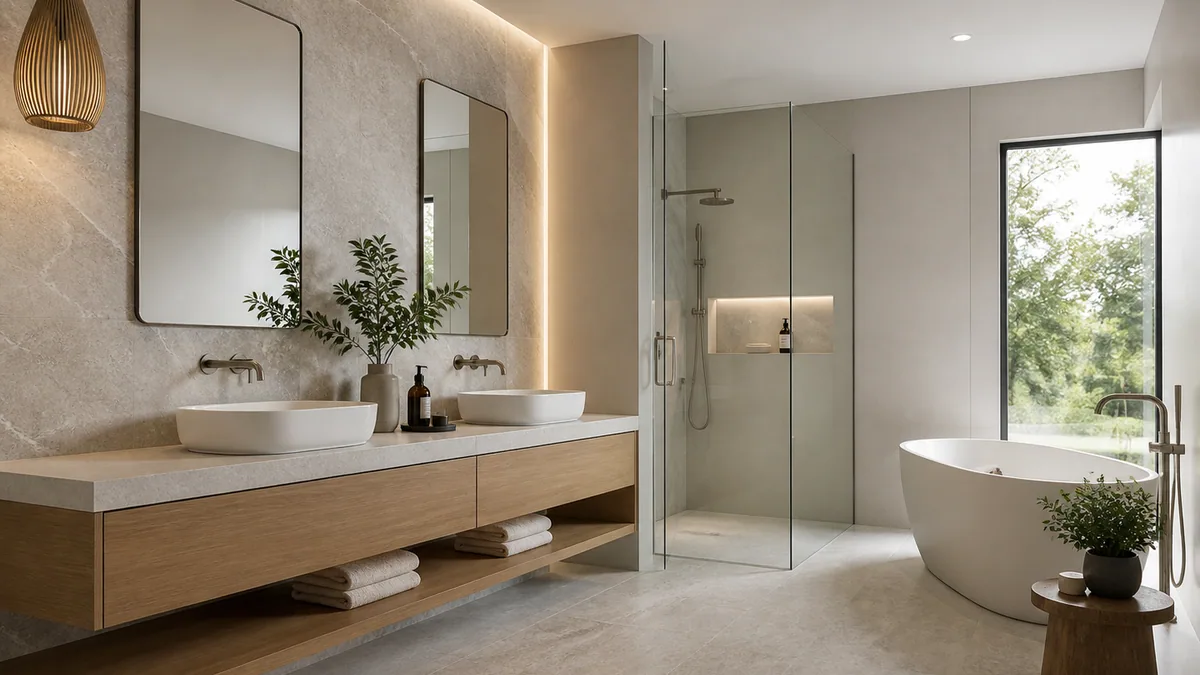
BeforeAfter
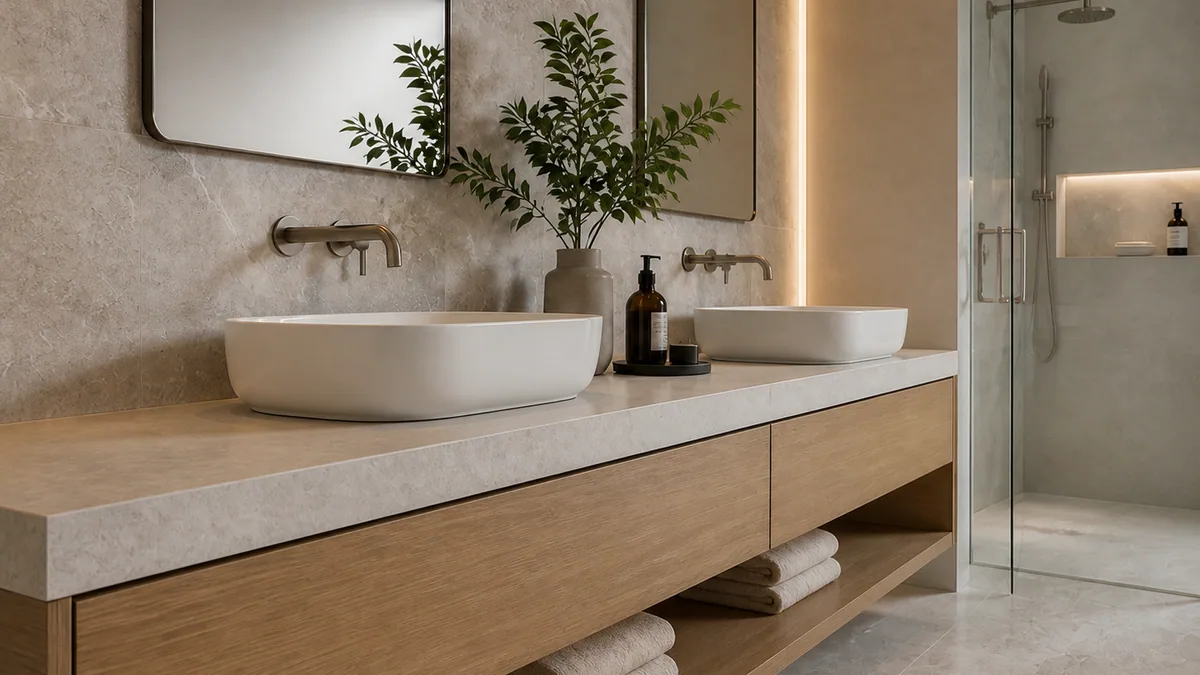
Wide View to Vanity Detail
Move closer to review the vanity, stone finish, basins, and fixtures. Use this detail view to discuss materials and joinery.
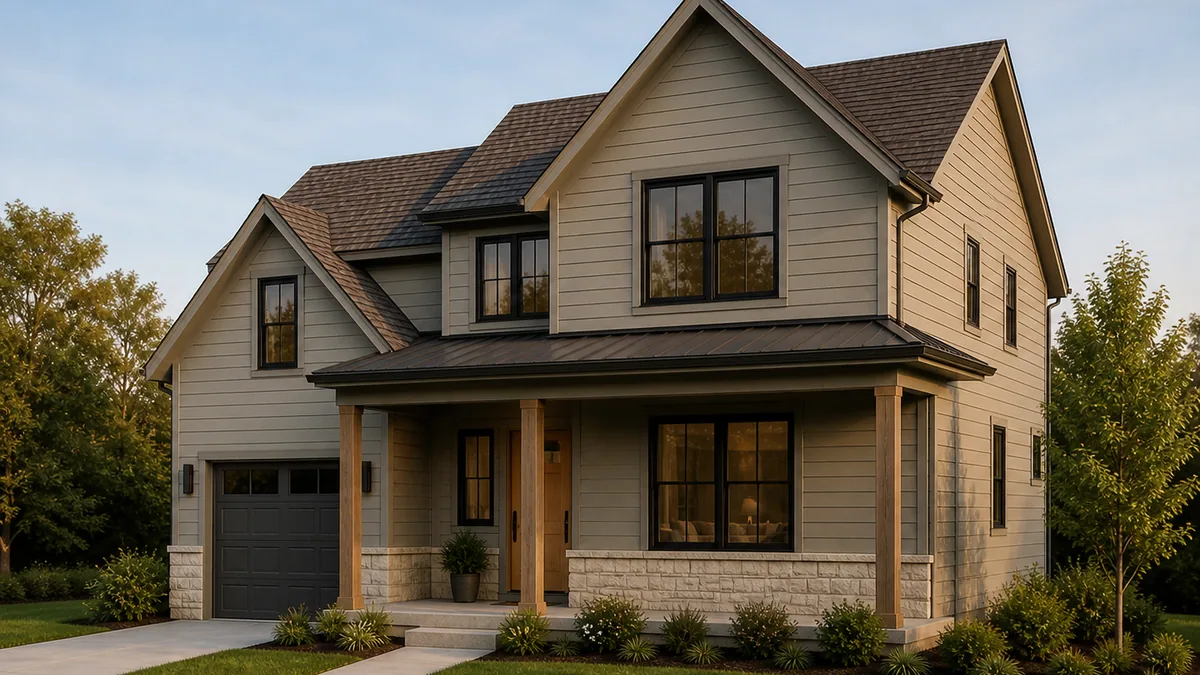
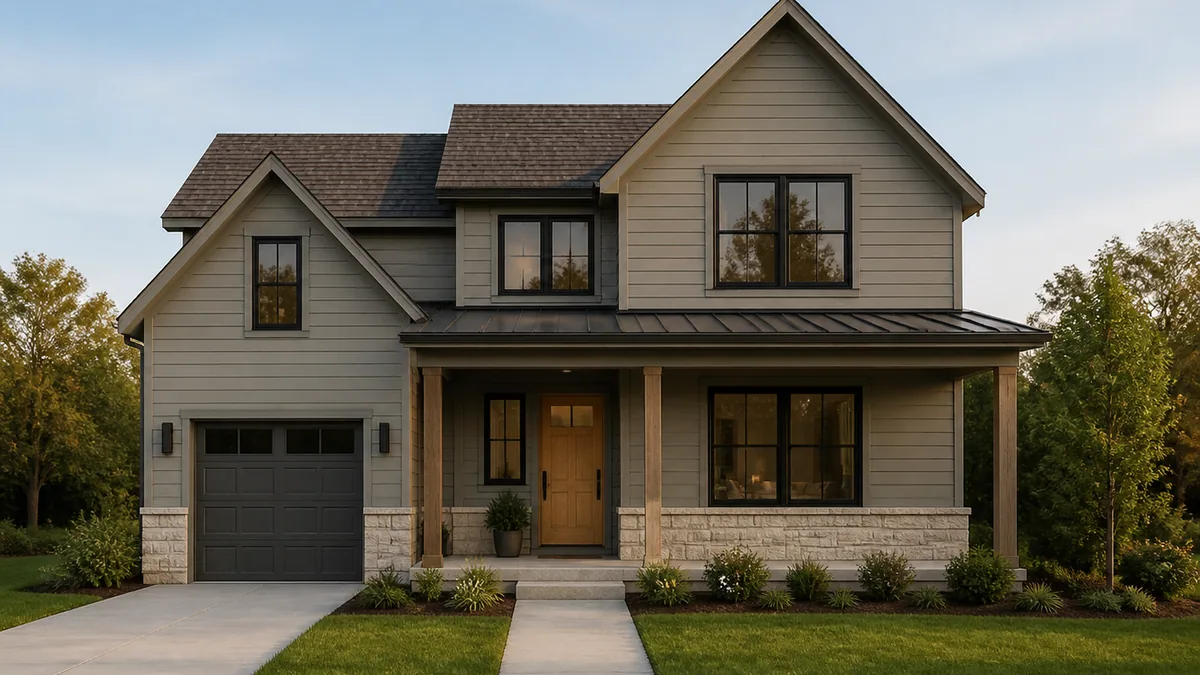
BeforeAfter
Front Exterior to Three-Quarter View
Show the front facade and side wall in one view. This angle makes facade depth, the entry, and the building form easier to read.
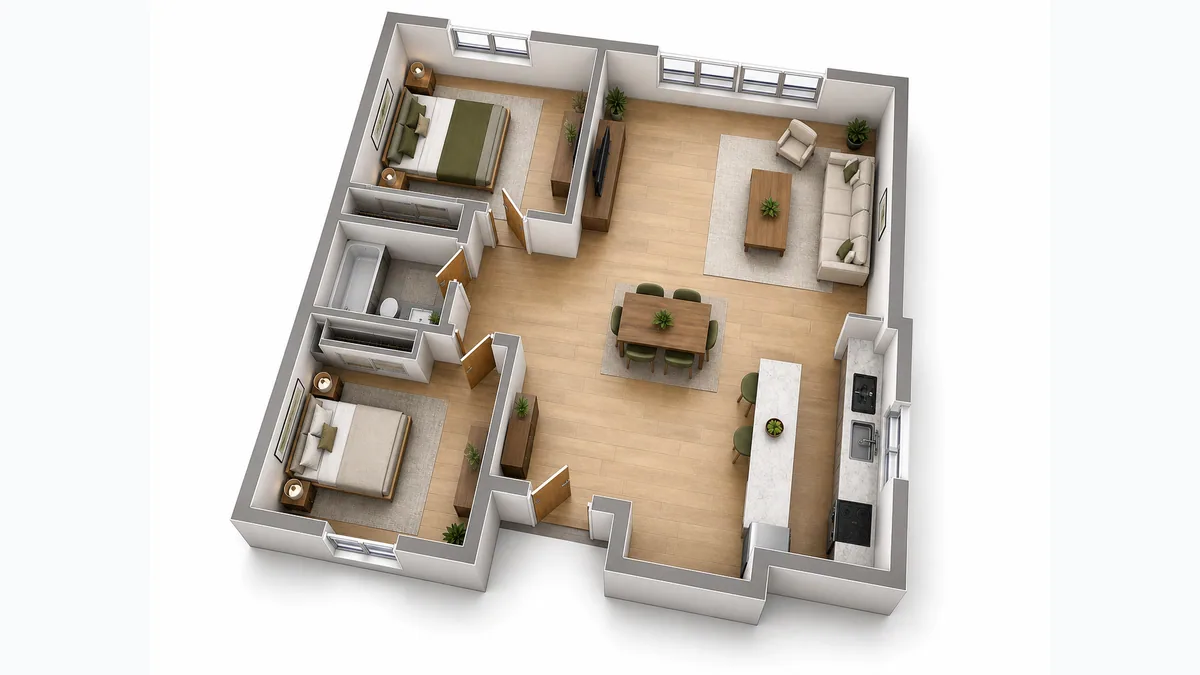
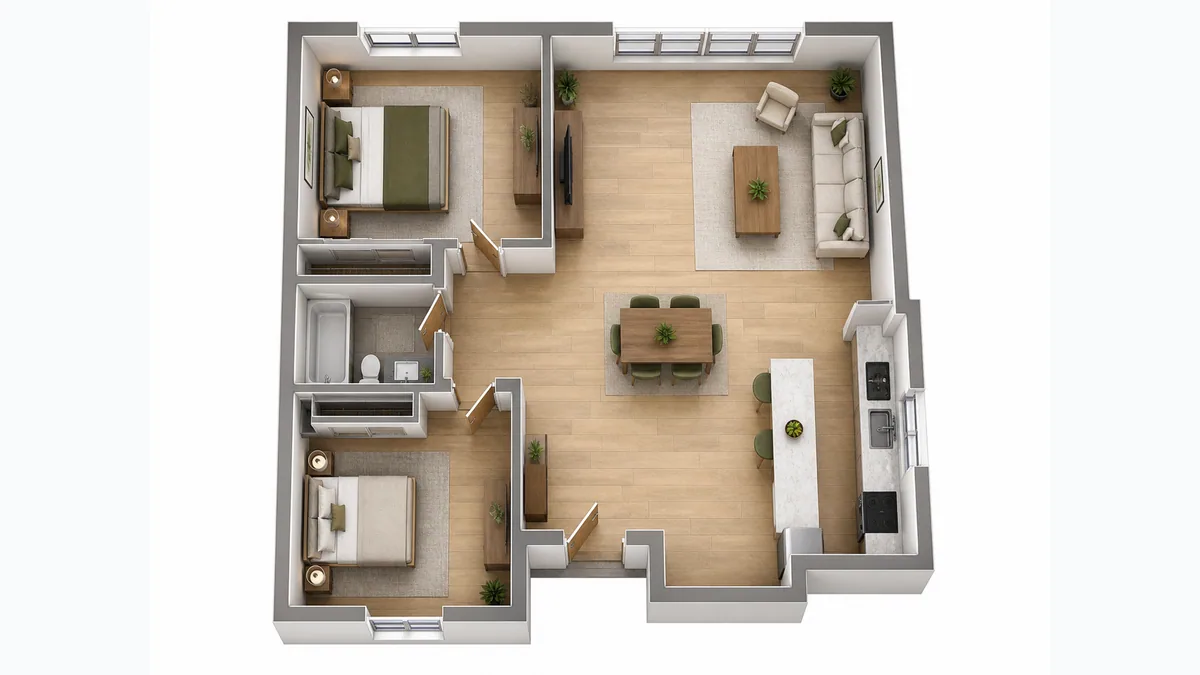
BeforeAfter
Top-Down 3D Floor Plan to Oblique View
Tilt the 3D floor plan to show wall height, room depth, and furniture placement. Keep the full layout visible for easier spatial review.
How to Change a Camera Angle with AI
Upload a clear design image and adjust one camera setting at a time. Generate one view, then compare it with the source before using it in a review or presentation.
Step 01
Upload Your Design Image
Upload an interior render, exterior view, space photo, or 3D floor plan. Images with clear depth and visible edges give the AI more useful scene information.
Step 02
Adjust the Camera View
Use Rotate, Vertical, or Zoom to change one camera setting at a time. Start with a moderate adjustment. Larger changes reveal more hidden areas and require more AI estimation.
Step 03
Guide Newly Revealed Areas
Describe how newly revealed walls, floors, ceilings, facade elements, or nearby spaces should continue. Note any materials or fixed features that should continue into the new area.
Step 04
Generate and Compare Views
Generate one view at a time and compare it with the source. Check doors, windows, openings, materials, furniture, and proportions before trying another angle.
AI Perspective Changer Features
Use the Rotate, Vertical, and Zoom controls to explore a new camera view from one design image. Generate one focused result, then compare it with the source.

Horizontal Rotation
Move the camera left or right to explore front, side, corner, and three-quarter views. Use rotation to reveal more room depth or facade form.

Vertical Camera Position
Raise or lower the camera to explore elevated, bird's-eye, eye-level, or low-angle perspectives. Use it to review layouts, ceiling features, or building height.

Camera Zoom
Adjust zoom to frame more of the scene or focus on a specific area. Use a wider view for spatial context and a closer view for materials or details.

Newly Revealed Area Guidance
Add optional guidance for surfaces or adjacent space that may appear outside the source frame. The instruction only applies where the original image provides no visible evidence.

Preview, History, and Download
Review generated views in Preview, reopen earlier results from History, and download the options you want to keep.
AI Perspective Changer Use Cases
Architects, interior designers, visualization teams, and property professionals can explore new camera angles from one design image. Use the results for early review, shot planning, and client discussions.
For Architects and Architectural Designers
Find useful exterior angles before returning to the 3D model
Explore front, corner, elevated, and three-quarter views from one concept image. Use promising angles to plan the next verified render.

For Interior Designers
Review room layout and focal points from another angle
Compare eye-level, corner, elevated, and detail views of one room concept. Choose the views that explain the layout, furniture, and key features most clearly.
For Visualization and CGI Teams
Narrow the shot list before final camera setup
Explore camera directions before setting up final views in the 3D scene. Use the AI results to narrow the shot list and prepare a clearer rendering brief.
For Studios and Design Consultants
Compare view options before choosing presentation images
Create several discussion views from one concept image. Check them against the source before sharing or developing final presentation renders.
For Real Estate and Development Teams
Review rooms, facades, and amenities from more than one angle
Explore visual options for internal planning and early marketing discussions. Confirm the design with the project team before publishing any AI-generated view.
AI Perspective Changer, Rotation, Correction, or 3D Rendering?
Use AI to explore a new viewpoint, rotation to turn the frame, perspective correction to straighten lines, or a 3D model when camera control and geometry must be verifiable. If an interior project needs repeatable camera positions and production-level control, compare rendering software by workflow.
AI Perspective Changer
Generates a new view from one image and fills areas that were not visible in the source. Best for fast angle exploration, not geometry verification or final documentation.
Image Rotation
Turns the whole image around its center. Use it to correct orientation or a tilted frame. It does not move the viewpoint or reveal hidden parts of the scene.
Perspective Correction
Straightens converging verticals, skewed lines, or photographed surfaces by transforming the existing image. It improves alignment but does not create a new camera view.
3D Camera Rendering
Moves a camera inside an existing 3D model and renders from its geometry. Use it for repeatable views, precise camera settings, and production-level control.
What to Know Before Using an AI Perspective Changer
AI can create a plausible new view, but it cannot recover exact geometry from one image. Check each result against the source image, 3D model, or project drawings.
Hidden Areas Are AI-Generated
New views may reveal walls, surfaces, furniture, or facade details that were not visible in the source. The AI generates these areas, and larger angle changes require more estimation.
Details Can Change Between Views
Doors, windows, furniture, materials, lighting, and proportions may shift. Compare each result with the source before using it in a review or presentation.
Not for Measurements or Construction
AI-generated views do not provide verified dimensions or construction geometry. Do not use them for technical documentation, compliance checks, or site decisions.
Use the 3D Model for Final Accuracy
Use AI views to explore camera angles and improve the rendering brief. Return to the source 3D, CAD, or BIM model when geometry and cross-view consistency matter.
More AI Design Tools
Move between floor planning, interior concepts, exterior studies, and landscape ideas in one ArchOne AI workflow.
ArchOne AI Studio
Continue Your Design in Studio
Keep the source render, camera studies, and later edits together when you need to compare several viewpoints for review.
Infinite canvasFocused toolsAI Agent
Continue in ArchOne AI Studio One connected workspace
AI Floor Plan Generator
Create early 2D or 3D-style floor plan concepts from property type, area, rooms, and layout notes.

AI Interior Design
Generate room concepts from photos, sketches, or references for materials, furniture, lighting, and style direction.

AI Exterior Design
Explore facade updates, exterior materials, color palettes, entry details, and curb appeal directions.

AI Landscape Design
Create outdoor concepts for planting, hardscape, patios, gardens, paths, lighting, and site review.
AI Perspective Changer FAQ
Still stuck? Contact us.
What is an AI perspective changer?
An AI perspective changer generates a new camera view from one existing image. It estimates scene depth and creates areas that were hidden in the source, so the result is useful for visual exploration rather than exact geometry.
How do I change the camera angle of an architectural render with AI?
Upload a render or space image, then use the Rotate, Vertical, and Zoom controls. Add optional guidance for newly revealed areas, generate one new view, and compare it with the source before downloading.
What images work best with the AI perspective changer?
Use a clear interior render, exterior view, 3D floor plan, or space photo with visible depth and well-defined edges. Avoid heavy blur, very tight crops, major obstructions, and images that hide most of the scene.
What image formats and file sizes are supported?
You can upload JPG, PNG, or WebP images up to 10 MB. Use the clearest source available so the AI has enough detail to estimate depth, edges, and surfaces.
What camera angles can I explore?
Use Rotate and Vertical to explore side, corner, three-quarter, elevated, bird's-eye, top-down, or low-angle views. Zoom can move the framing closer or wider. The usable range depends on how much of the scene is visible in the source.
How many perspective images can I generate at once?
Each request generates one focused perspective image. A signup preview uses 2 credits; later views use 4 credits each. The tool shows the current cost before generation.
How can I keep a design consistent across multiple AI camera angles?
Use the same clear source image for every view. Change one camera setting at a time, keep adjustments moderate, and compare each result with the source. Check doors, windows, materials, furniture, and proportions. This can reduce visual drift, but it cannot guarantee repeatable geometry.
Can an AI perspective changer create a consistent architectural walkthrough from one render?
No. It creates separate still images, not a continuous camera path or a geometrically consistent walkthrough. Use it to explore camera directions, then return to the source 3D, CAD, or BIM model for repeatable views and final animation.
How is perspective change different from rotation and perspective correction?
Image rotation turns the existing frame. Perspective correction straightens skewed or converging lines from the same viewpoint. An AI perspective changer generates a view from a different camera position and may create areas that were not visible before.
Can an AI perspective changer replace a 3D render?
Not when geometry, dimensions, or repeatable camera settings must be exact. Use AI views to explore angles and improve a rendering brief, then return to the verified 3D, CAD, or BIM model for final production.
Can I use an AI-generated view in a client presentation?
Yes, for early concept review when the image is clearly presented as an AI-generated visual study. Check it against the project design first, and do not present it as verified geometry or construction information.
Is the AI Perspective Changer free to try?
Yes. New verified accounts can use their 2 signup credits for one 1K watermarked preview. Later perspective views use 4 credits each; current credit allowances and paid options are listed on the Pricing page.
Where are my images stored, and can I download or delete them?
Generated views appear in Preview and are saved to your History and Workspace when account features are available. You can download a result from the tool. Uploaded images and outputs may be stored to provide these features, and you can request deletion as described in the Privacy Policy.
Last updated: September 26, 2026
Explore a New View with the ArchOne AI Perspective Changer
Upload a room render, exterior concept, architectural visualization, or space photo. Generate camera-angle options for early design review, client discussion, or a clearer rendering brief.